Intelligent RDS Monitoring: Connecting AWS RDS to pgEdge AI DBA Workbench
AWS RDS handles operations like provisioning, patching, and backups. What it doesn’t do is tell you why your query latency spiked at 2am, whether that replication lag is trending up, or what to do about it.
The pgEdge AI DBA Workbench connects to any PostgreSQL 14+ instance — including RDS — over the standard wire protocol. No agent on the host, no migration required. Once connected, it collects metrics across 34 probes, runs three-tier anomaly detection, and gives Ellie (an optional AI assistant) the context she needs to walk you through diagnosis and suggest fixes.
This guide covers the full setup: connecting your RDS instance to the Workbench, the SSL/TLS configuration AWS requires, and what you’ll see once it’s running.
Note: While extensions like system_stats and spock are not supported on RDS, the AI DBA Workbench still provides deep visibility through standard PostgreSQL metrics and its own AI analysis engine.
Prerequisites
Before diving into the integration, ensure your environment meets the following requirements:
1. AI DBA Workbench Core Services
Your Workbench environment must be installed and active. This guide assumes you are running on a Linux-based server (e.g., RHEL/CentOS or Ubuntu).
Verify that the core services are running:
# Start AI DBA Workbench core components
systemctl start pgedge-ai-dba-collector.service
systemctl start pgedge-ai-dba-server.service
systemctl start pgedge-ai-dba-alerter.service
# Update SELinux policy to allow Nginx to bind to port 8444
semanage port -a -t http_port_t -p tcp 8444
#Start the nginx Service
systemctl start nginx.serviceNote: This guide assumes installation via the (open source, and free to download) pgEdge Enterprise repository. Alternative setups, such as Docker-based deployments, follow a different configuration process and are not covered in this guide.
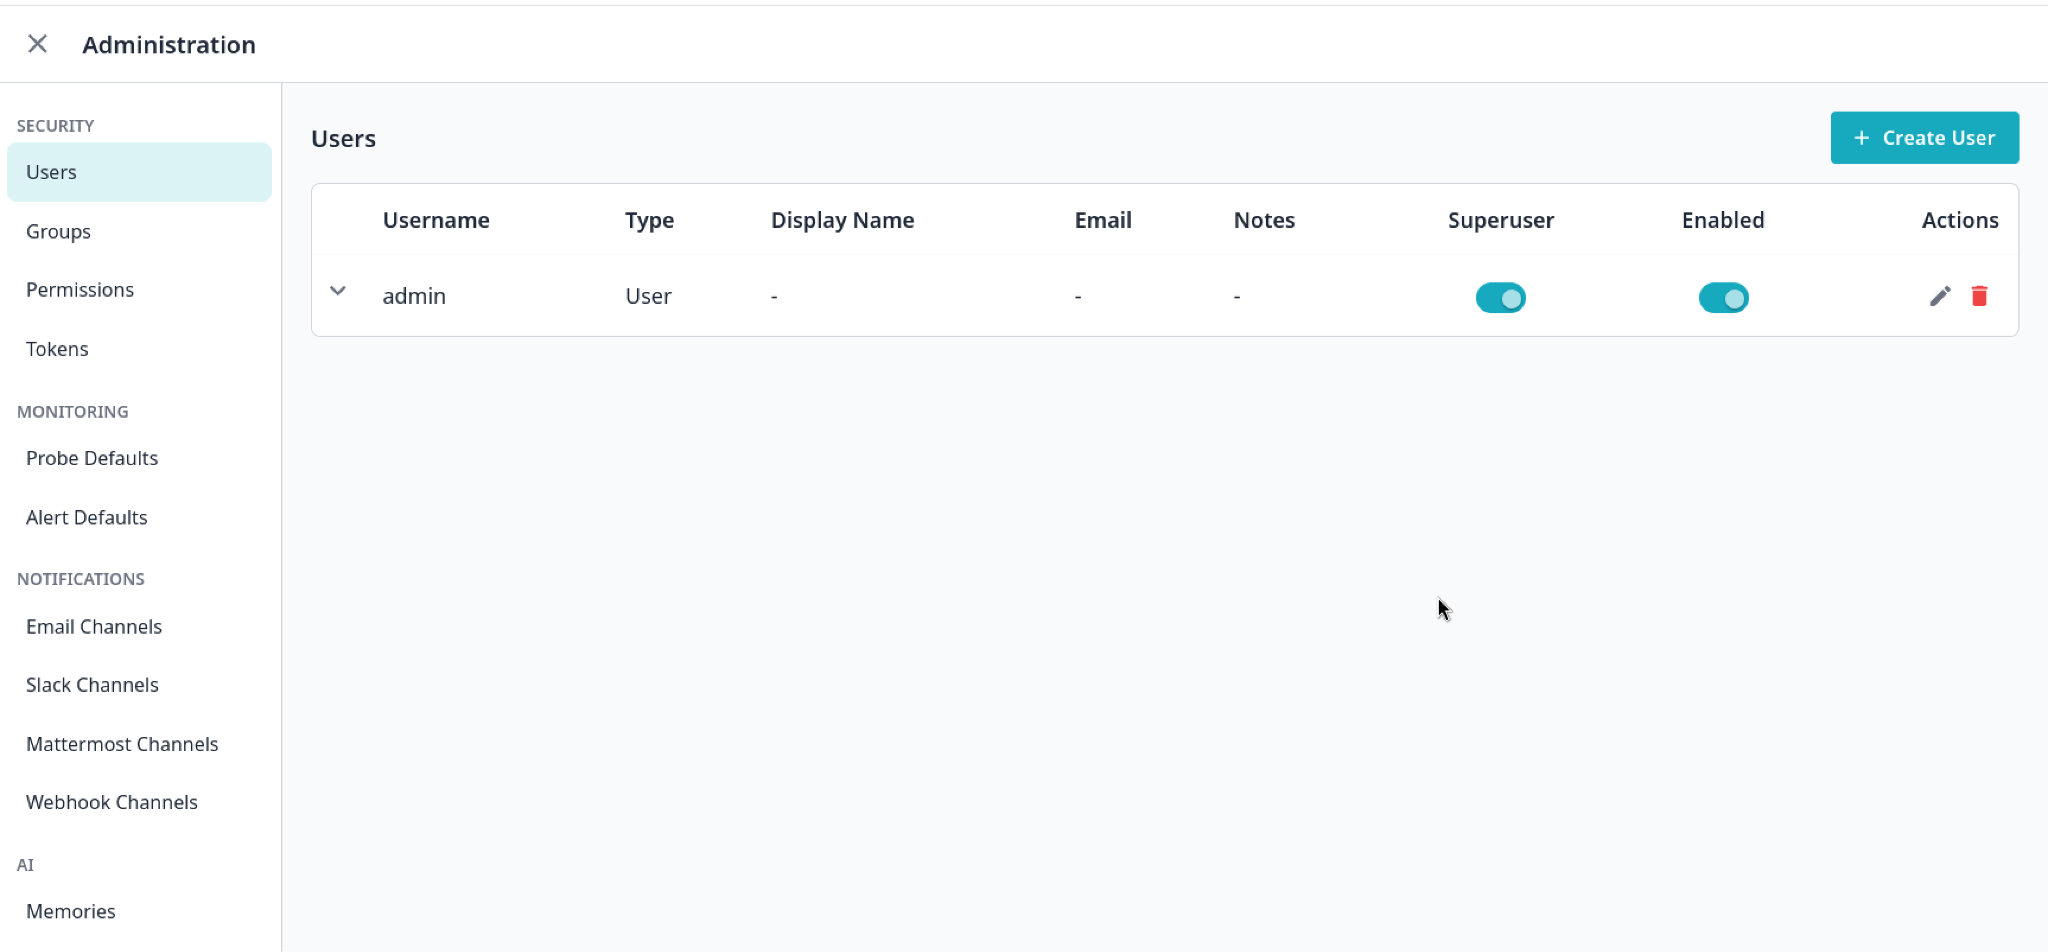
2. Create a Workbench Superuser
You need administrative access within the Workbench to add new servers and clusters.
# Add the admin user
/usr/bin/ai-dba-server -add-user -username admin -data-dir /var/lib/pgedge/ai-dba-server/
# Grant superuser privileges
./ai-dba-server -set-superuser -username admin -data-dir /var/lib/pgedge/ai-dba-server/
# Expected Output: User 'admin' is now a superuser3. Prepare Your RDS Instance
Log in to the AWS RDS Console.
Ensure your instance is configured for Public Access (if connecting from outside the VPC) and uses the Free Tier or higher.
Note your Endpoint (Host) and Port (default: 5432).
Ensure you have the postgres user password.
Step-by-Step Guide: Securely Connecting RDS
Step 1: Secure Your Connection with the RDS Global Bundle
AWS RDS uses specific CA certificates for SSL/TLS. To use verify-full security (the gold standard for production), the Workbench needs to trust the AWS Root CA.
Download the global bundle certificate:
curl -o global-bundle.pem https://truststore.pki.rds.amazonaws.com/global/global-bundle.pemStep 2: Configure Permissions and Certificate Path
The AI DBA Workbench runs under the pgedge user. You must move the certificate to a directory the service can access and set the correct ownership.
# Copy to the AI DBA server directory
cp global-bundle.pem /var/lib/pgedge/ai-dba-server/rds-global-bundle.pem
# Set appropriate ownership and permissions
chown pgedge:pgedge /var/lib/pgedge/ai-dba-server/rds-global-bundle.pem
chmod 644 /var/lib/pgedge/ai-dba-server/rds-global-bundle.pem# Restart the service to apply changes
systemctl restart pgedge-ai-dba-server.serviceIntegrating RDS via the Workbench UI
Step 3: Log In to the Workbench
Launch your browser and navigate to the Workbench GUI (typically http://localhost:8444/). Log in with the admin credentials you created earlier.
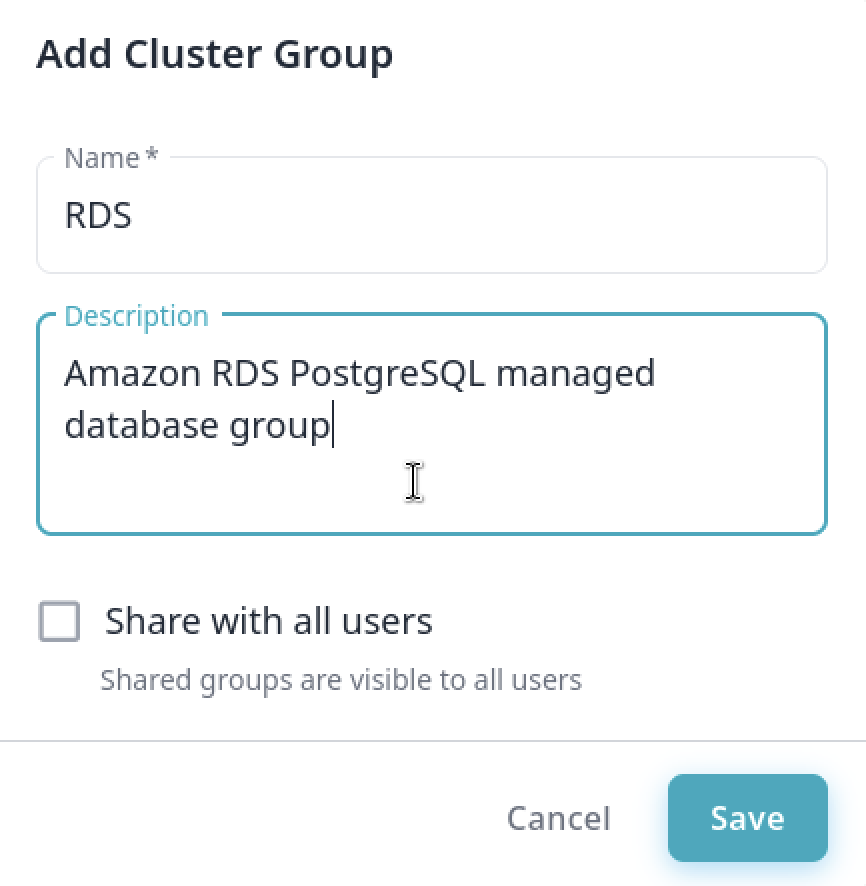
Step 4: Organize with Server Groups
Grouping your resources keeps your dashboard clean, especially as you add more environments.
Navigate to Clusters in the sidebar.
Click New Group.
Name it RDS.
Click Save.
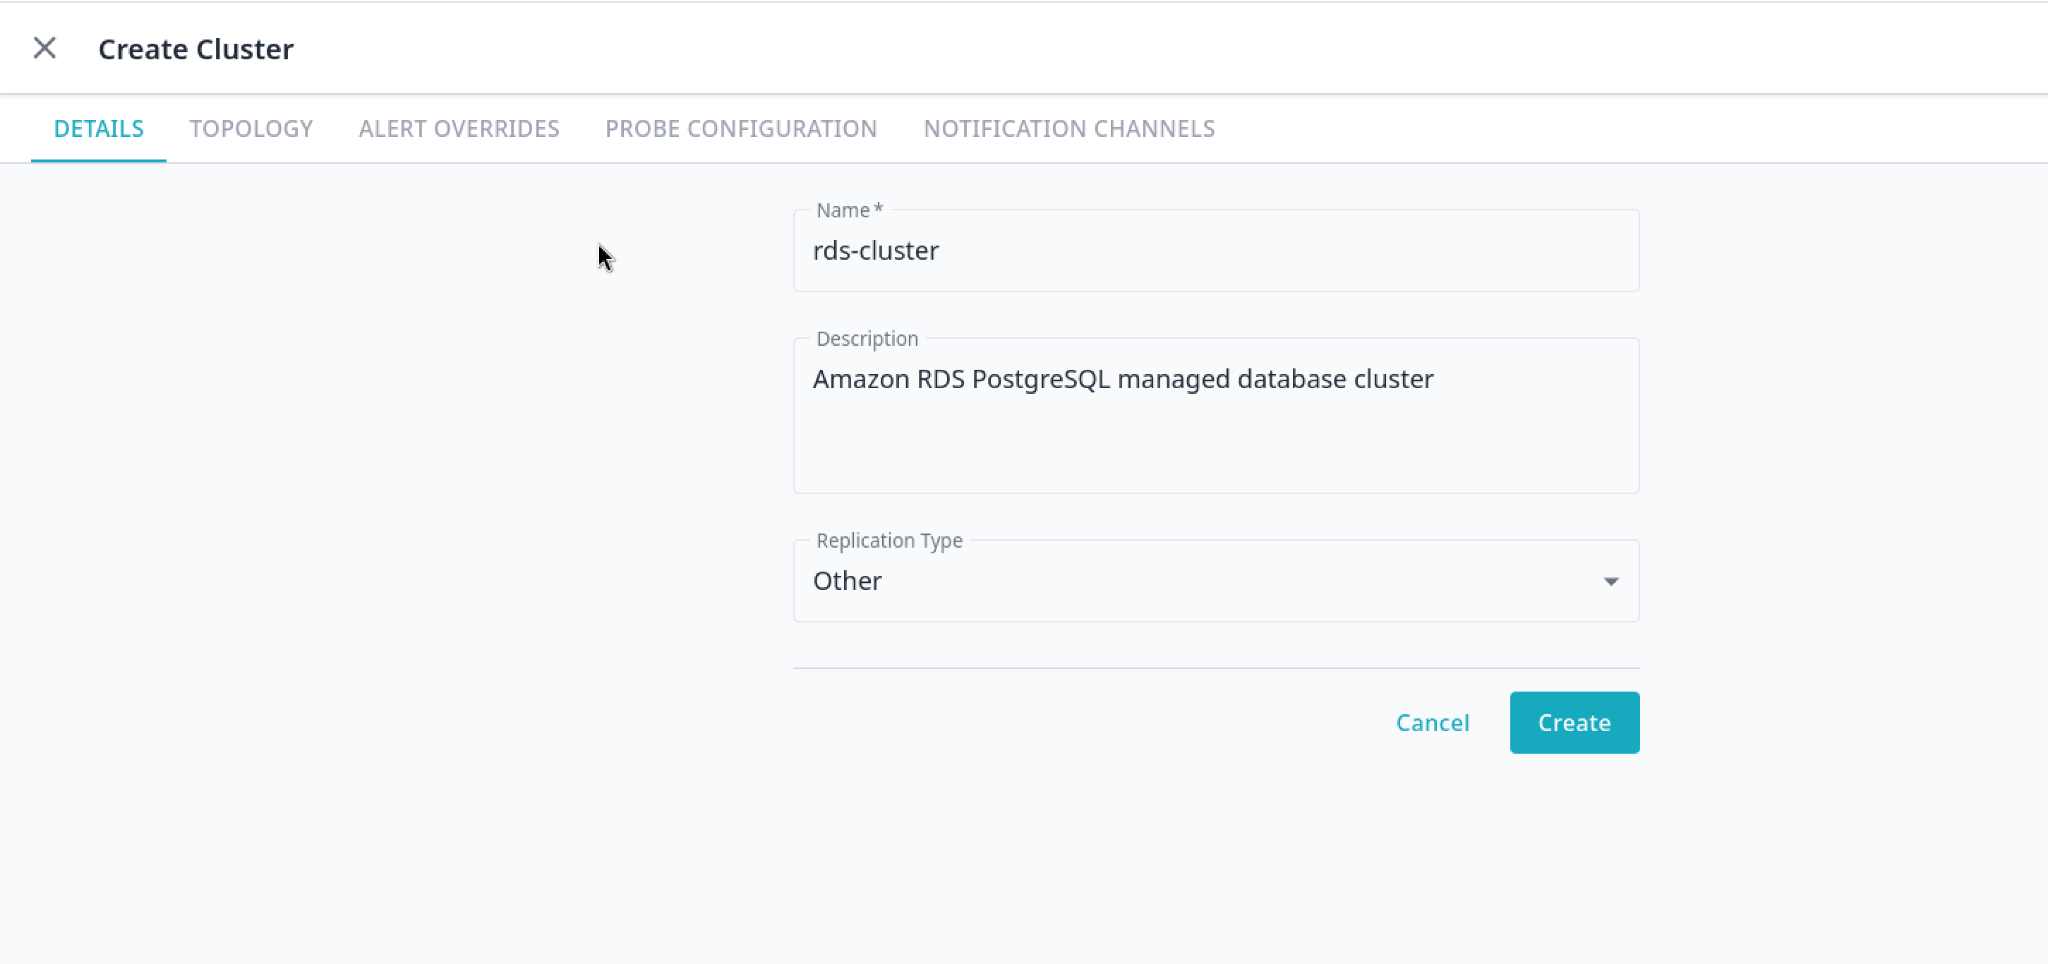
Step 5: Define the RDS Cluster
Inside the RDS group, click New Cluster.
Name: rds-cluster
Replication Type: Select Other.
Why? Since RDS manages its own replication (Multi-AZ/Read Replicas), the Workbench treats it as an external cluster.
Click Save.
Drag the newly created cluster and drop it into the RDS group to organize your workspace.
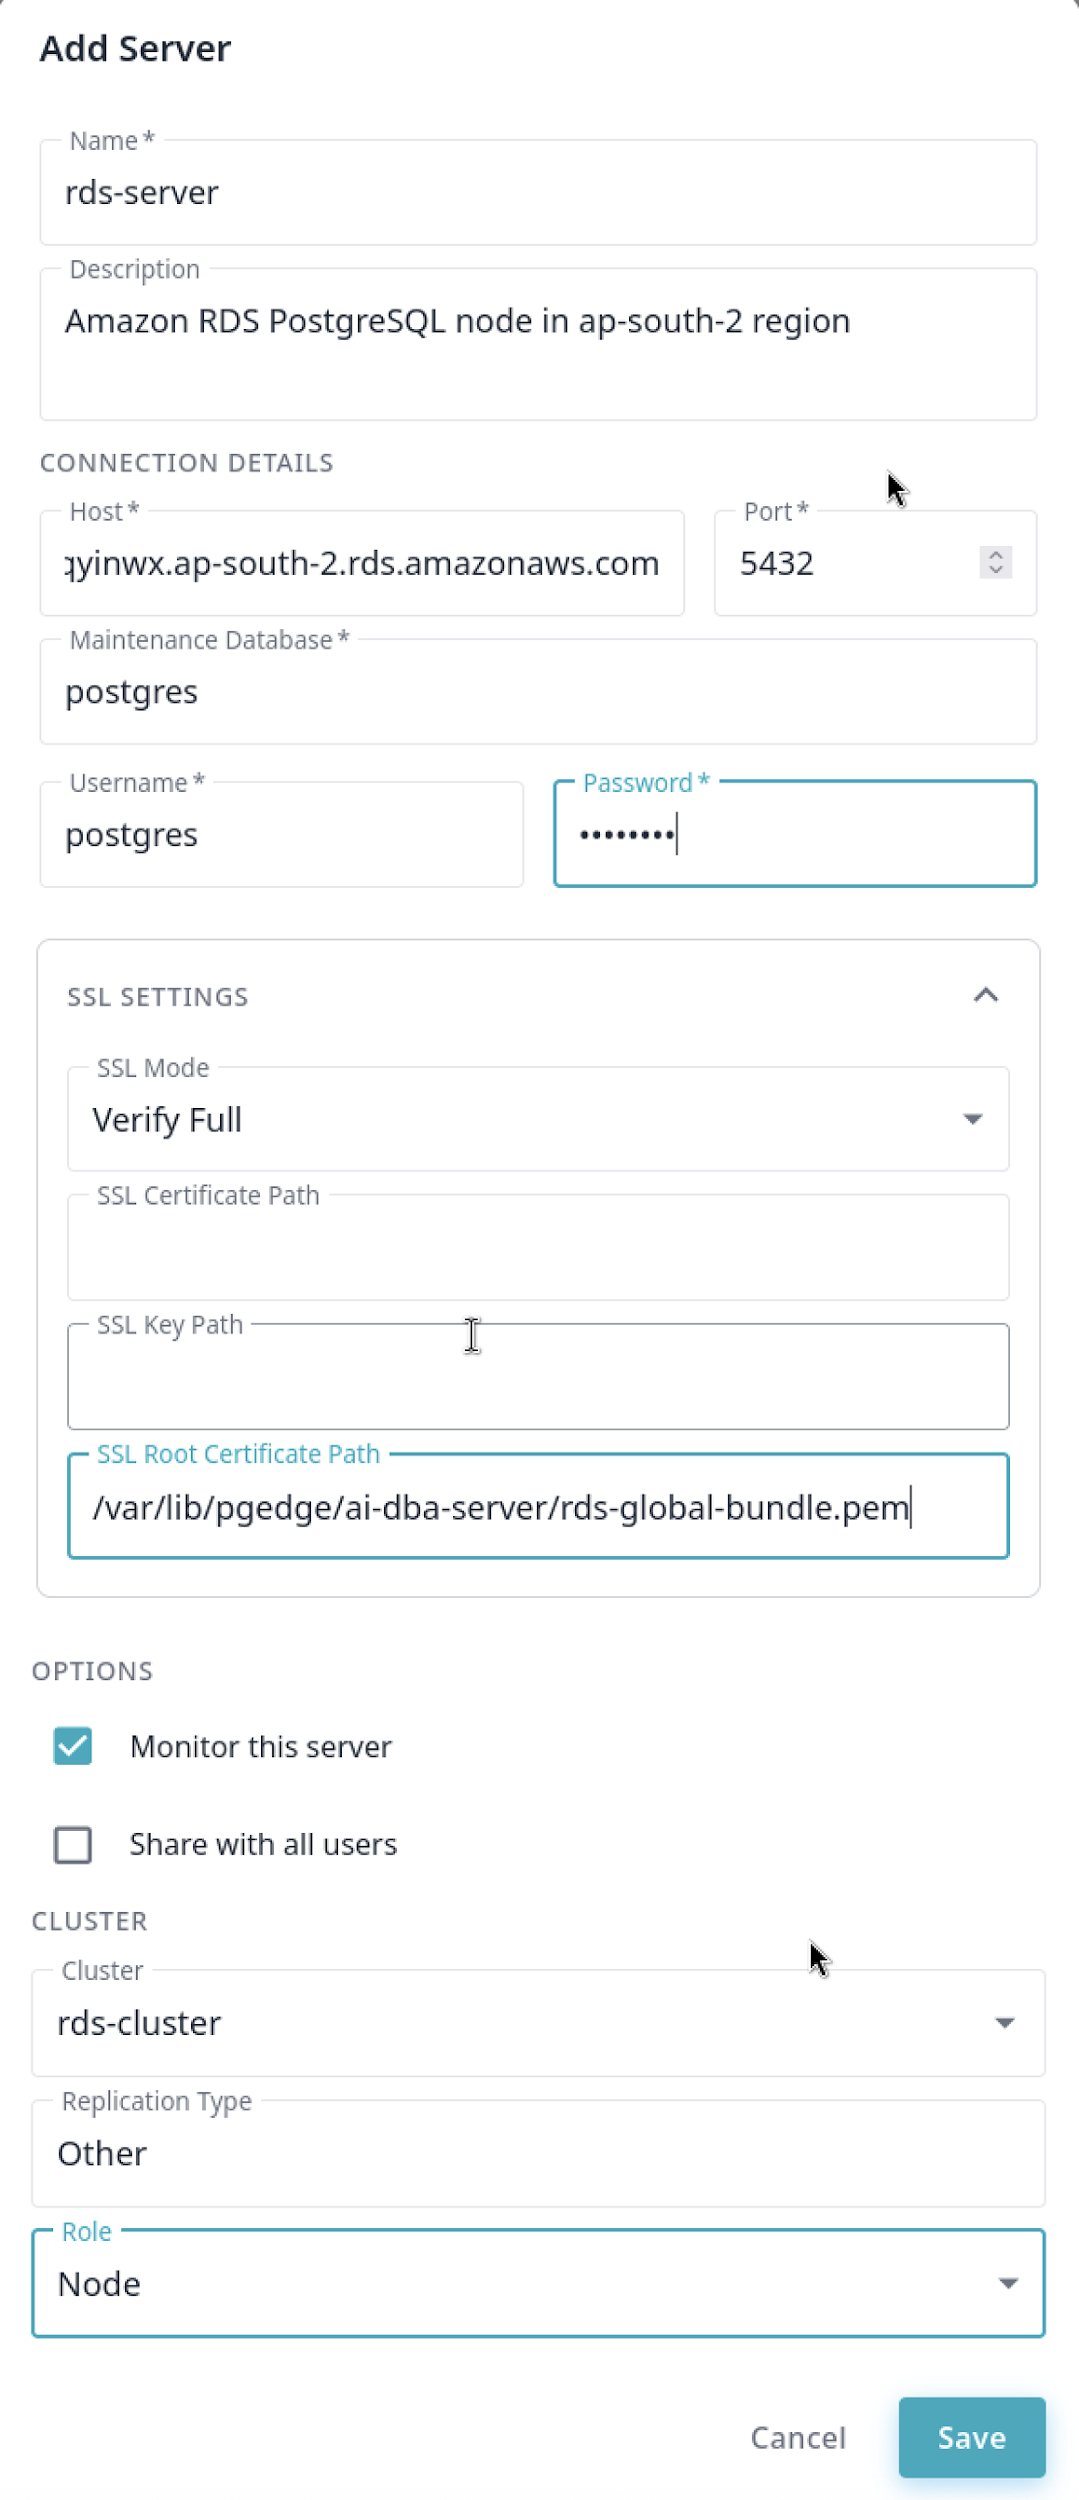
Step 6: Add your RDS Instance as a Server
This is where we link the specific database node. Click Add-server.
Click Add-server.
Enter the details from your AWS Console:
Host: your-db-instance.xxxx.rds.amazonaws.com
Port: 5432
User: postgres
SSL: verify-full
SSL Root Certificate Path: /var/lib/pgedge/ai-dba-server/rds-global-bundle.pem
Select the rds-cluster and set the Role to Node.
Click Save.
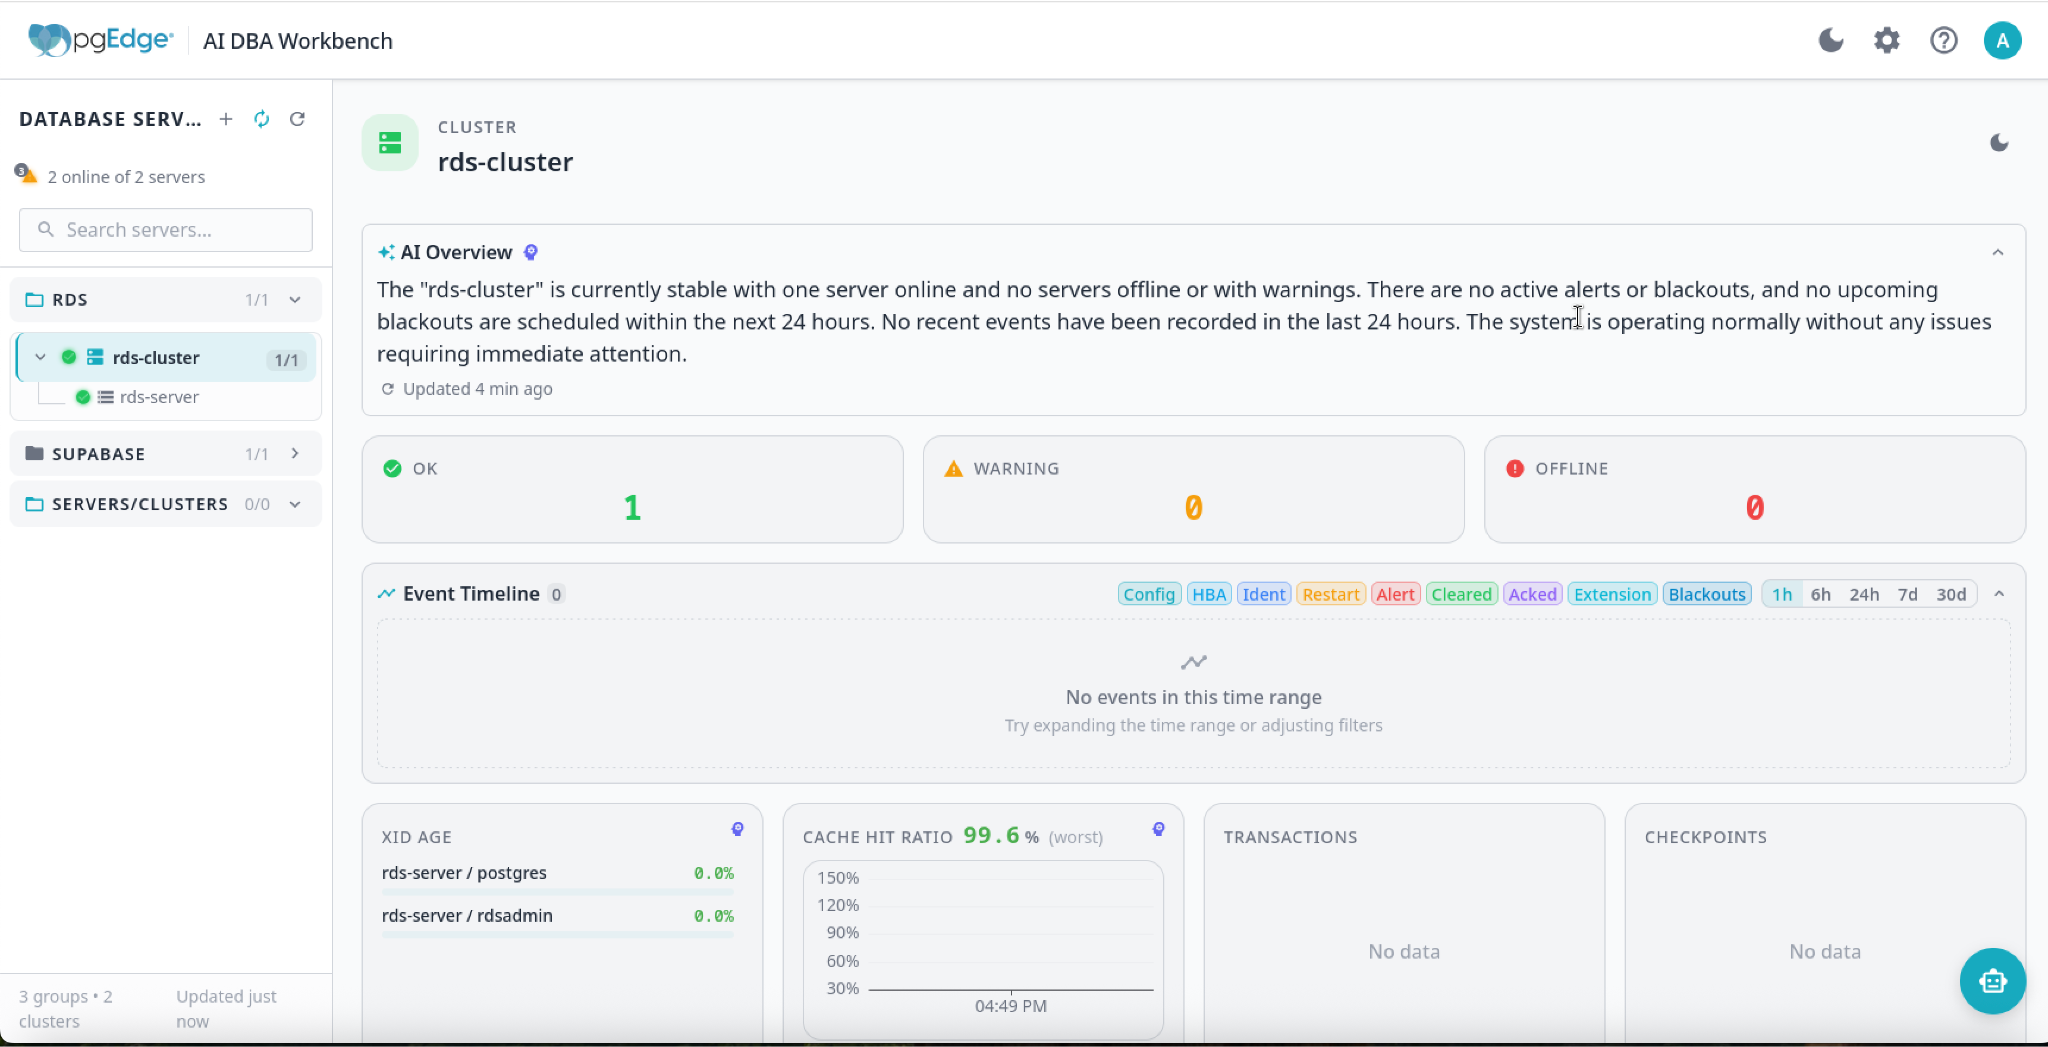
Exploring the AI-Driven Insights
Once connected, your RDS instance becomes part of the pgEdge ecosystem. Here’s what you should explore first:
The AI Overview
The AI Overview doesn’t just show you data; it interprets it. It provides a narrative summary of your database health, highlighting potential bottlenecks and offering performance suggestions.

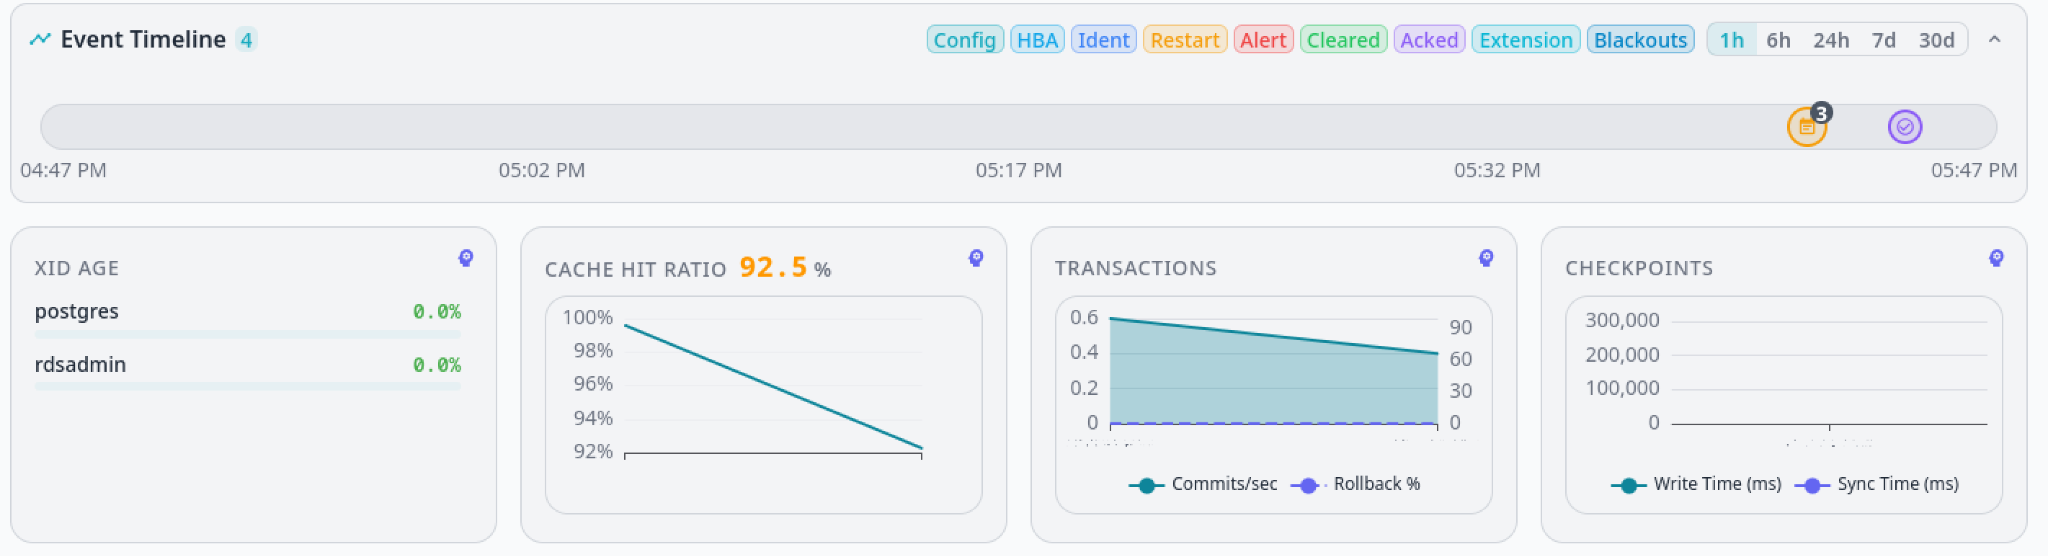
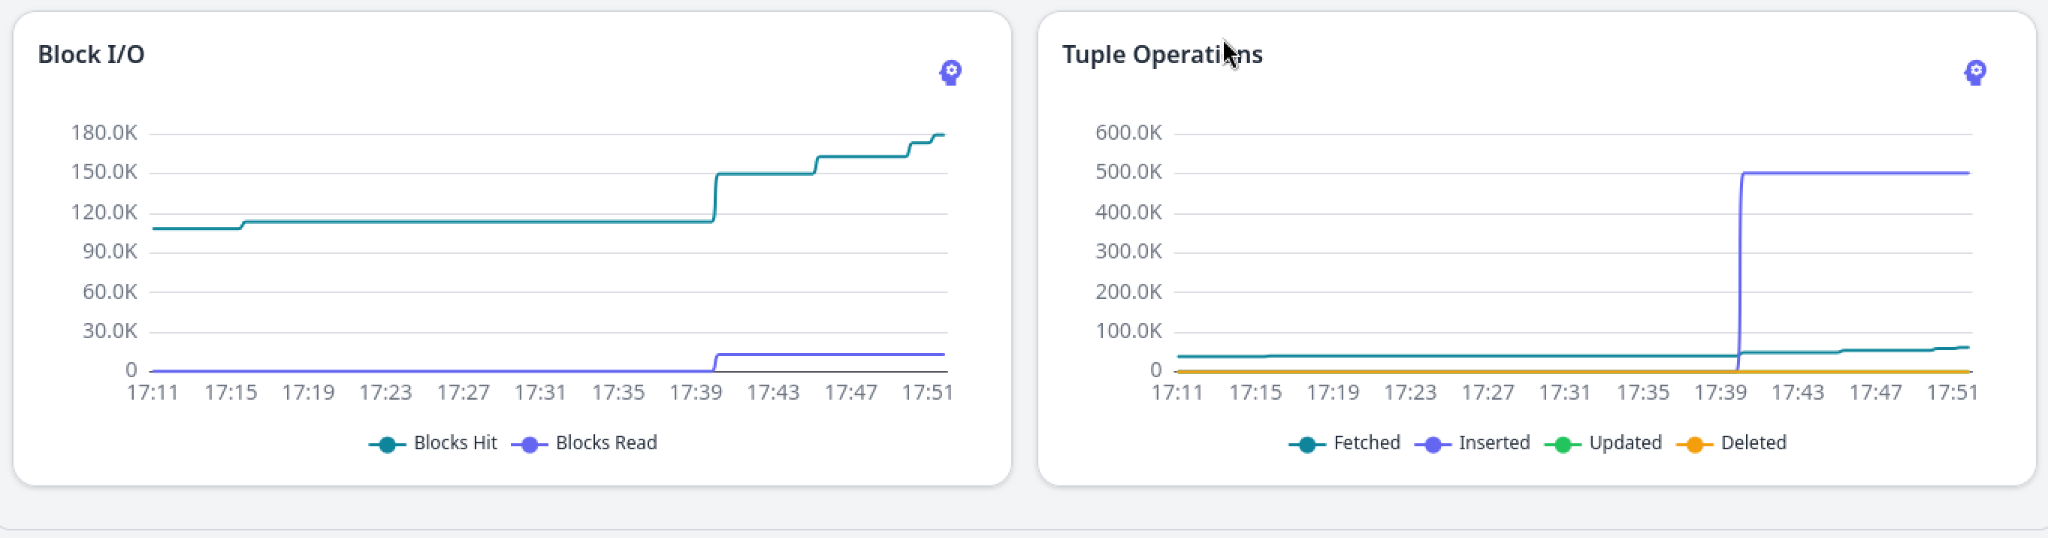
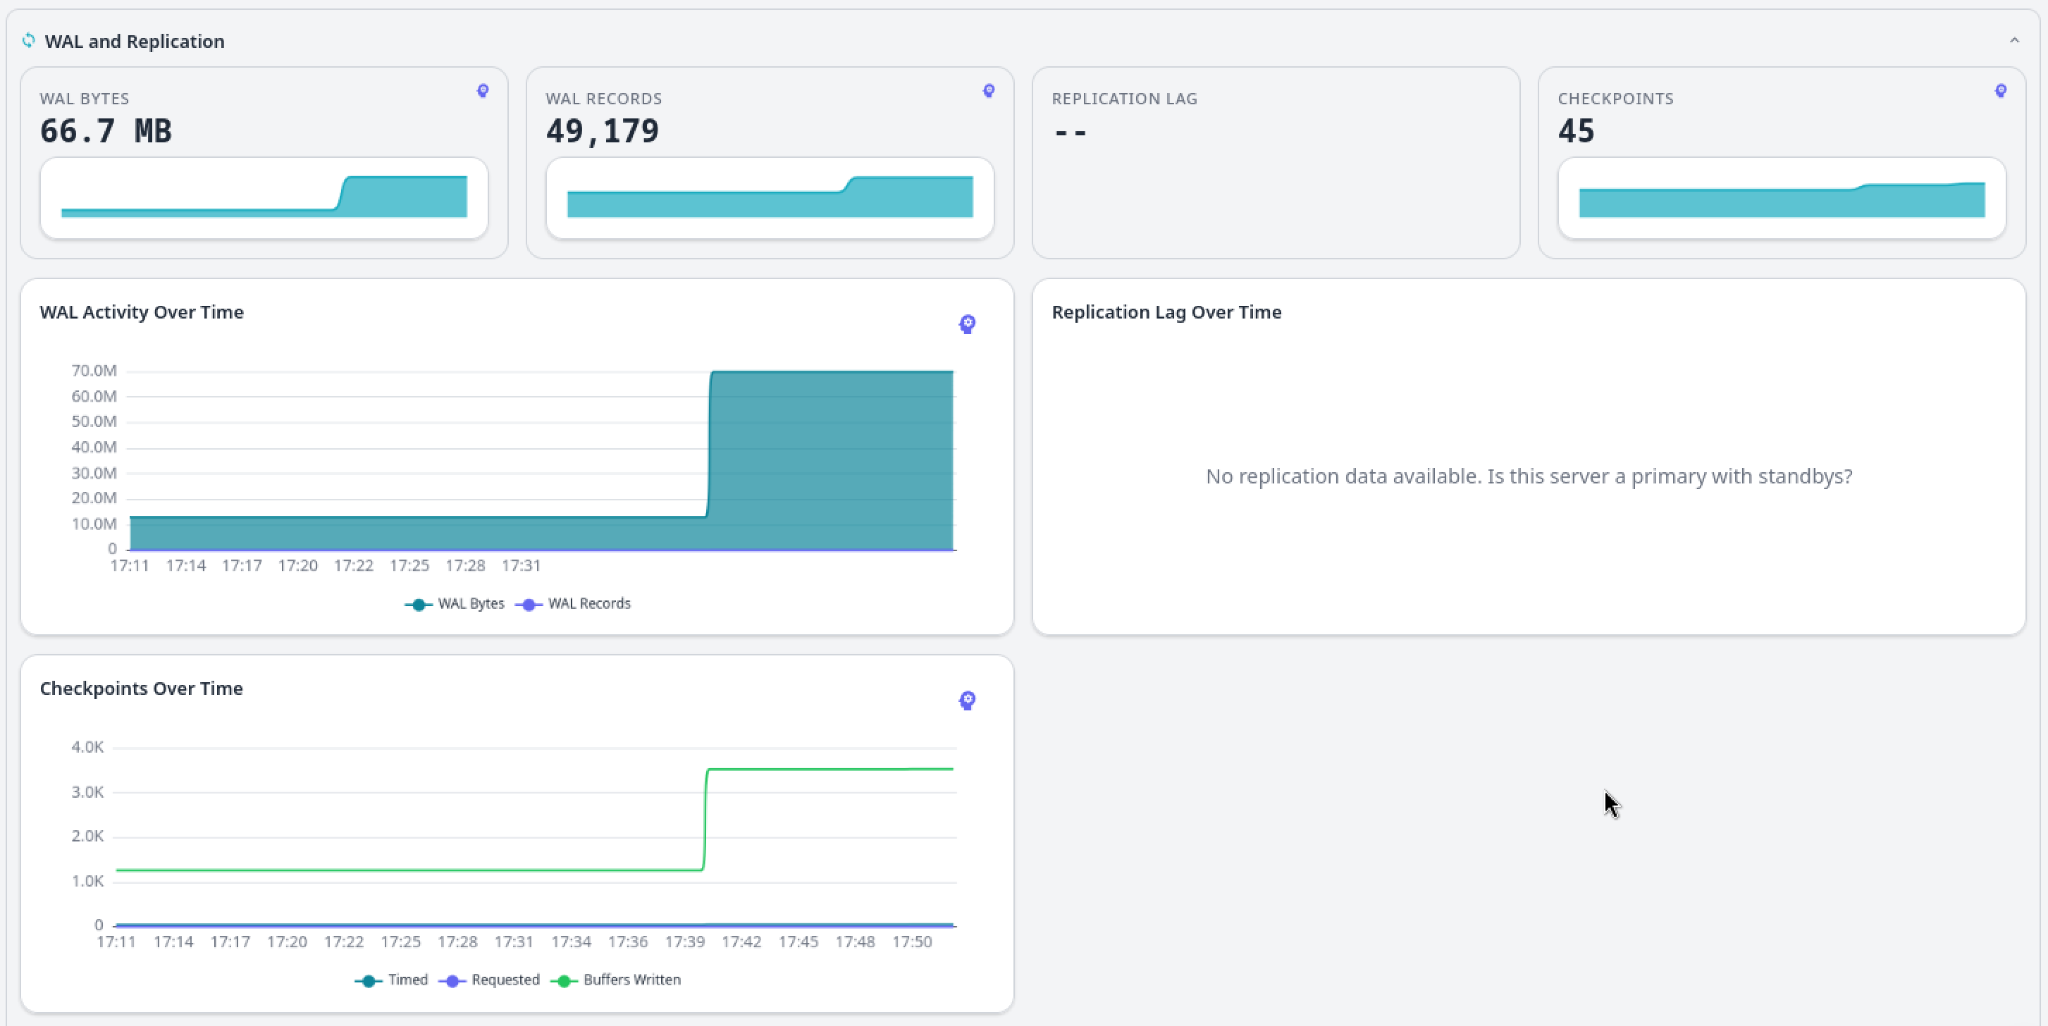
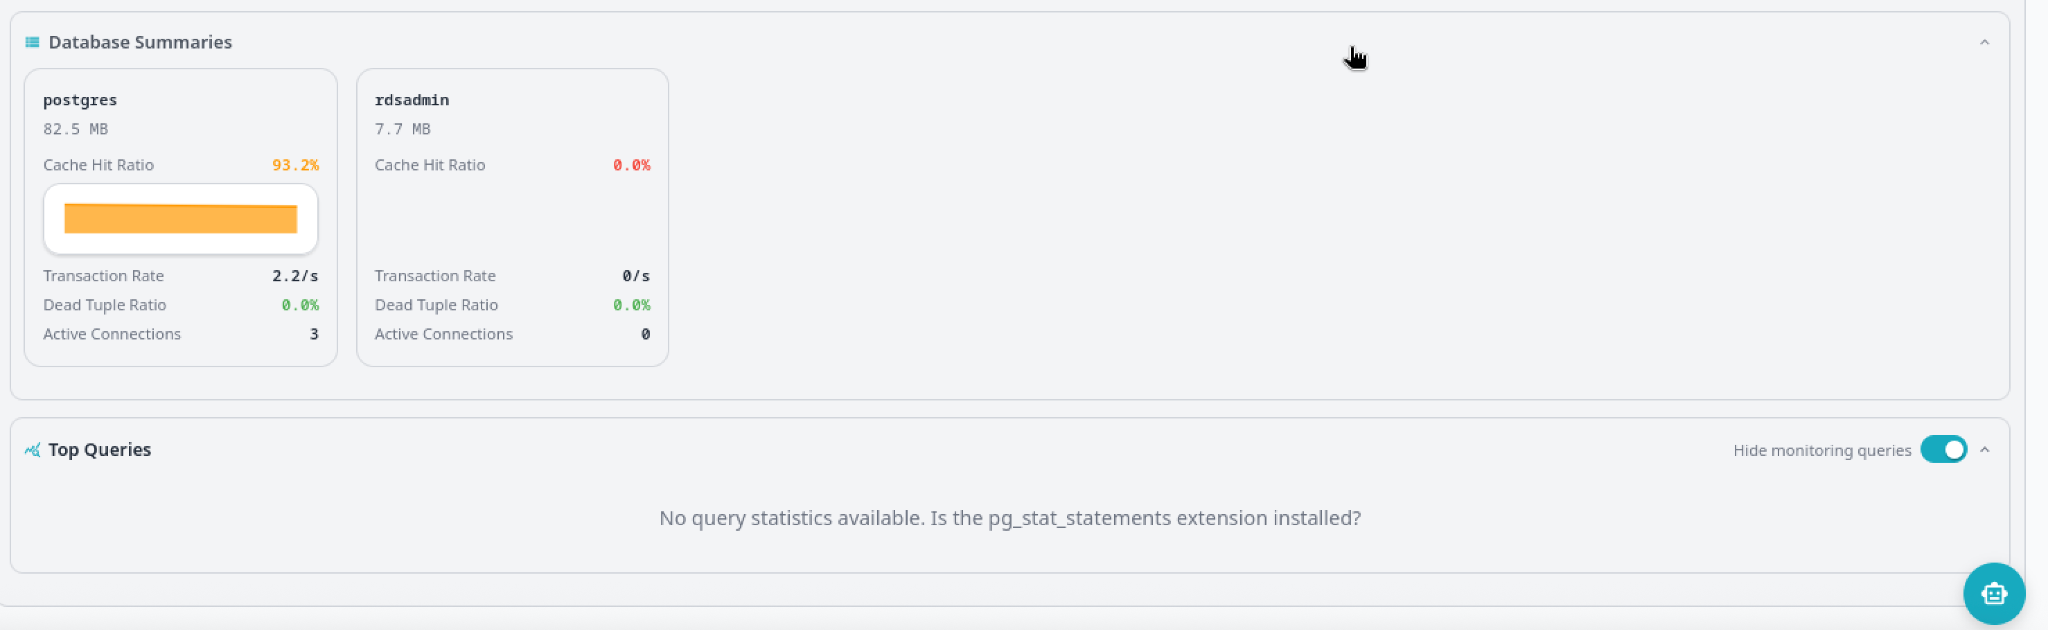
Real-Time Metrics & Visualizations
Get granular with dashboards covering everything from connection counts to query latency. These visual cues help you spot trends before they become issues.

Administration & Alerting
Set up custom alert rules and notification channels (like Slack or PagerDuty) via the Administration Settings to ensure you’re always informed about the state of your RDS instance.
Conclusion
The Workbench runs on your infrastructure, your data stays there, and it works against any Postgres 14+ instance without touching the host. What you’ve set up here works the same way against any other RDS instance, or any other Postgres database in your estate.
Prefer to see how to connect the AI DBA Workbench with RDS, live? Paul Rothrock walks through the full thing, step-by-step, in this video tutorial.
Learn more about the AI DBA Workbench on our website or on GitHub.
Best Practices for RDS Monitoring
Always use
verify-full: This ensures you are actually talking to AWS and prevents man-in-the-middle attacks.Isolate Groups: Use Server Groups to separate production, staging, and development RDS instances.
Review AI Insights Weekly: Make it a habit to check the AI Overview for emerging patterns in query performance.

